Windows 7 was originally released back in 2009 as the successor to Vista. It uses that same Aero UI. The difference between the two is:
- Faster boot times.
- New UIs.
- Addition of internet explorer (IE) 8.
If you want to get a taste and install it this article will teach you how to create a Windows 7 bootable flash drive from an ISO or DVD image.
All you need to begin following the steps below is a USB stick. I would recommend a minimum of 4 GB of free space. Any brand will do.
Contents
Some Windows 7 History
Back in 2007 Microsoft announced the development of a new operating system and then in 2008 its name was revealed. In 2009 its manufacturing was released and made it available by the end of the year. This served to be the successor to Vista and predecessor to Windows 8.
The versions it came in and some internal development codenames:
- Windows 7 Home Premium.
- Professional.
- Ultimate (Was the most popular edition).
In some markets following editions are available:
- Starter.
- Home Basic.
- Enterprise
It code names in development are:
- Vienna
- Blackcomb.
Reference: Webopedia OS History webpage.
SEE ALSO: Create a fully functional bootable flash drive in Windows 10 with CMD.
Features Windows 7 was known for
- Pin apps to the taskbar.
- Rearrange apps on the taskbar in any order.
- Libraries for storing files. Default library has documents, videos and pictures each having a public and private version.
- Accurate handwriting recognition.
- Supports multitouch capabilities.
- Snap and shake capability; it allows user to drag an open window towards the left or right side of the screen and have it automatically resize to take up almost half of the screen.
- Jump lists; developed to take users towards files and tasks they work most in an app. It appears in the start menu or taskbar.
- Direct access for mobile workers; with this IT administrators can update group policy settings and distribute updates related to software any time device has internet connectivity. Either the user is logged on or not it provides support to multi-factor authentication and encryption.
- XP mode; enables older apps designed for Windows XP to use a virtualized version of the XP operating system. To end user, the app runs on the desktop.
- BitLocker to Go; it extends on-disk encryption and key management techniques towards storage devices.
- Virtual hard disk support; it enables IT to mount VHD and interact like it was a physical drive.
- A redesigned look with transparent themes and wallpapers.
SEE ALSO: Create Windows and Linux Bootable Flash Drive in Google Chrome OS.
Create your own Windows 7 Bootable Flash Drive from ISO or DVD
If you want to install windows but have no DVD drive then it is easy to create one with the correct installation media.
Download the official image file – make sure it’s untouched
Before you create one make sure to have this as an ISO file. If you have an installation DVD already, use it to create an ISO file using ImgBurn; a utility that has been around forever. You can also download it from Microsoft directly.
You need a minimum 4GB driver for this.
Note: Make sure to copy anything you want from it as this process shall erase it.
Once you have in hand both ISO and flash drive you are ready to move forward.
Download Windows 7 Official Untouched ISO
Creating your Bootable USB using Microsoft Download Tool
As your saved ISO file to your system:
- Download and install this tool from here.
The description provided on the page and the tool talks a lot regarding windows 7 and XP but you do not need to worry about this.
- Once downloaded, create a USB installation drive which is a simple yet straightforward process.
- Run tool; permit it to make changes to your system.
- Select browse to find to locate the file.
- Hit next.

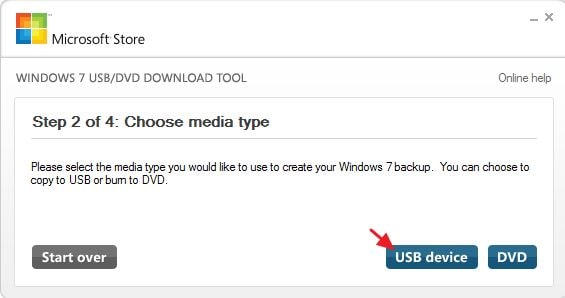
- On the next page, select the USB device, if you need to option then the tool can burn ISO to DVD.
SEE ALSO: Tutorial to Fix USB stick not recognized errors.
- Use the drop-down menu to select the drive you wish to use, if not inserted yet, do it now, and click on the refresh button.
- As you get the right one selected, select begin copying.

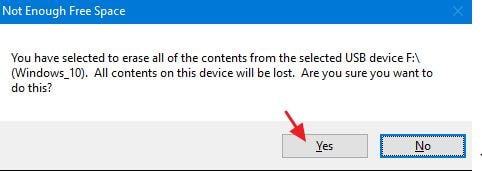
- If you anything on drive you’ll see a warning about being formatted and you shall lose data stored on it.
- Click on erase USB device.
- You won’t see the warning if you have started with the newly-formatted drive.
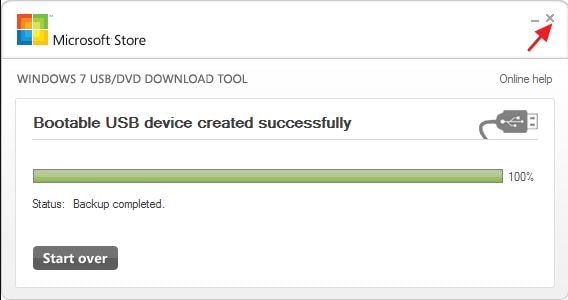
- Wait for the process to complete; this may take around 15-20 minutes. Drive shall be formatted and files copied to drive.

- Close download tool as the process is finished.
- If you look at drive-in file explorer, you shall see the same files that you will if you have opened installation DVD.

As you get the drive use it to start the system on which you have to install windows. You might need to fiddle with BIOS on the system to allow it to boot from USB or change the order of boot so that it boots from the USB first. You also might be able to use the disk on a PC that does not support booting from USB, for the bootable CD you need to carry out some additional steps.
SEE ALSO: Download Windows 10 Untouched AIO DVD Image.
Your turn
So this was how you can create a Windows 7 bootable USB using ISO or DVD images. We have shared a very simple, basic, and straightforward method that is also suitable and easy to follow for people who are not IT literate. A word of advise I will give is that this OS has now reached EOL (End of Life) support. This means it is no longer kept updated.


