Today many software are present that let us boot the pen drive quickly. Following are the software’s that can be used widely to make a bootable flash drive for Windows 10/11:
- Win 32 Disk Imager
- UNetBootin
- Rufus
However, we will show you how to make a Pendrive bootable using CMD (command prompt) in Windows 10/11. Sometimes software cannot get things done correctly, and sometimes the user does not have them. In this guide, we are going to learn how we can create a bootable USB, explain what it is and how to boot from a USB in BIOS.
Contents
What is a Bootable Pendrive/Flashdrive?
The bootable pen drive is also known as the bootable USB. It is a disk that is used to boot up your computer if you do not have any operating system, i.e., standalone storage that can boot your computer.
You can also use the prompt to create a bootable pen drive for Windows Vista and later (7/8/8.1/10). You will have to use third-party tools to make a bootable pen drive for Windows or any Linux Distribution.
How to Make a Pendrive/Flash Drive Bootable using CMD in Windows 10 & 11
Windows Command Prompt is present on all computer windows. So you do not need to worry about downloading any new package or pen drive to make the pen drive bootable. Although it is a lengthy process yet traditional and works always:
As an administrator, run the CMD command. This step is of prior importance as you are going to edit disks that require admin privileges. With an admin right, there are several ways through which you can open a command prompt.
First of all, make sure you have downloaded Windows 10 ISO. If you do not have an installation copy, you cannot continue. You might get an error where the USB drive is not being found. Read our tutorial on how to fix ‘USB device not recognized’ error. This will make sure CMD can see the flash drive.
Before this:
- Press Windows + X and then select the Command Prompt (admin).
- Open the start menu and search for CMD, right-click on this and select to run this as an administrator.
- Then open the task manager, click on the file then the new task and tick create this task with admin privileges. Type CMD and press the Enter button.
After this:
- After this connect your pen drive to the system
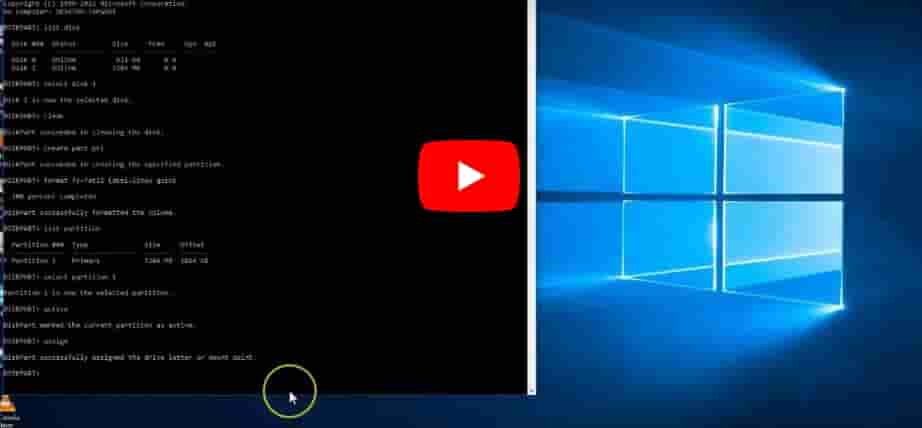
- Type the disk part and hit the enter button. When you do this, it will open the windows inbuilt disk part utility that is used to manage the storage on your computer.
SEE ALSO: How to turn on Windows 10/11 SSH Feature in Command-Line.
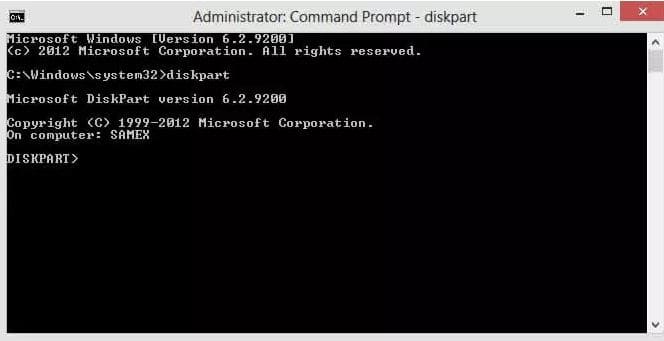
- Type the disk list and press enter. This shall list storage devices available on your system
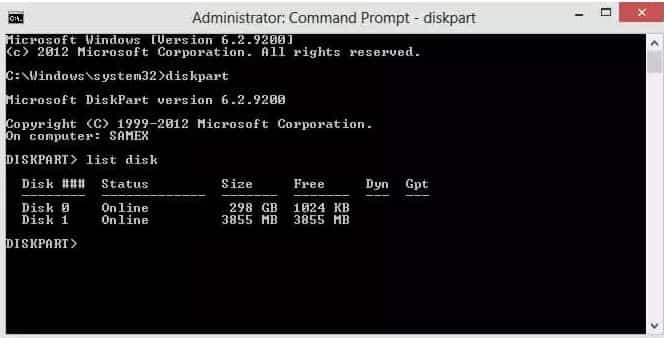
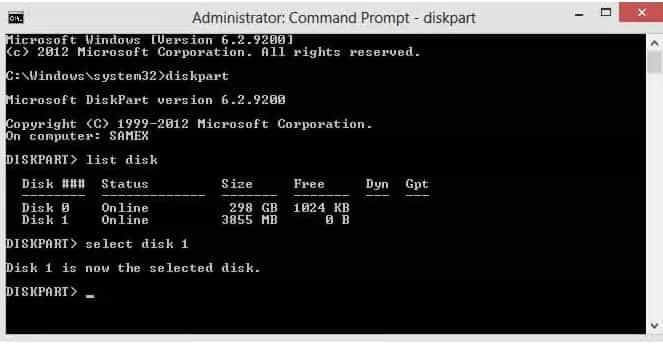
- Type select 1, and press enter to choose your pen drive. (the disk one might have a different name on your order so choose wisely and carefully).
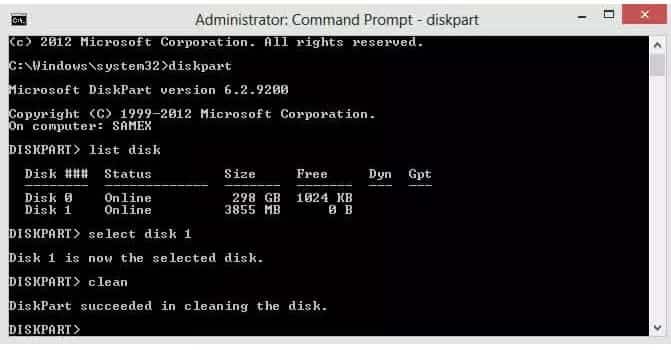
- Now type clean and hit the enter button. All the data shall be erased from the pen drive.
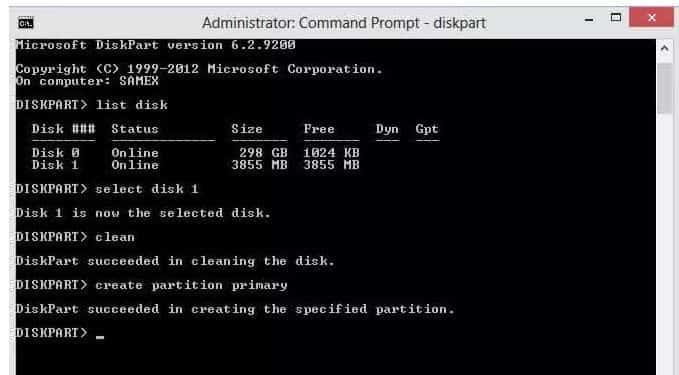
- Type create a partition and hit the enter button
- Then type: select partition 1 and press the enter button. This shall choose the partition that we have just created.
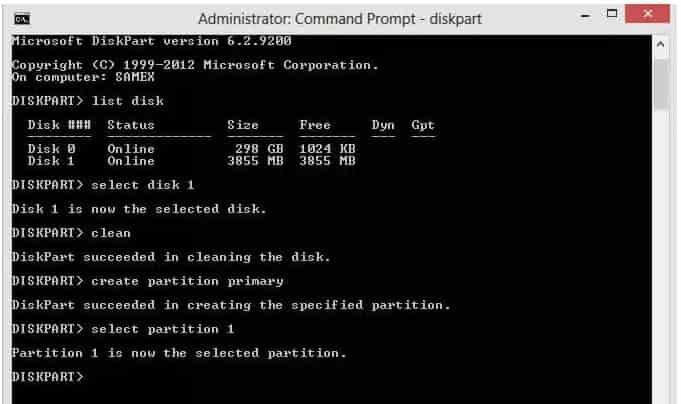
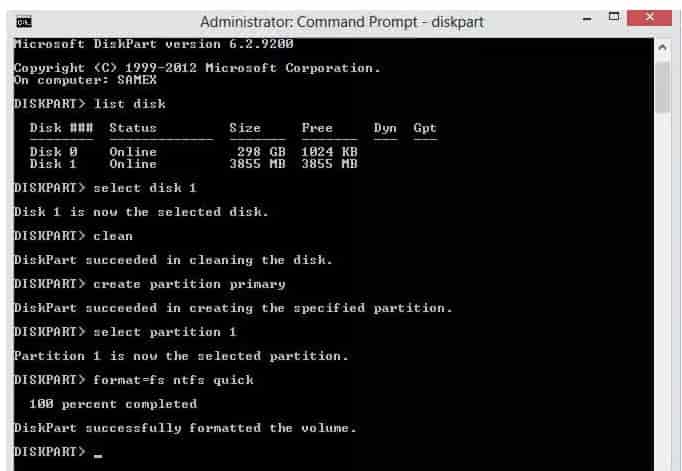
- Type format=fs NTFS quick and press the enter key. With the NTFS file system, a quick format will be performed. NTFS file is for storage by Windows.
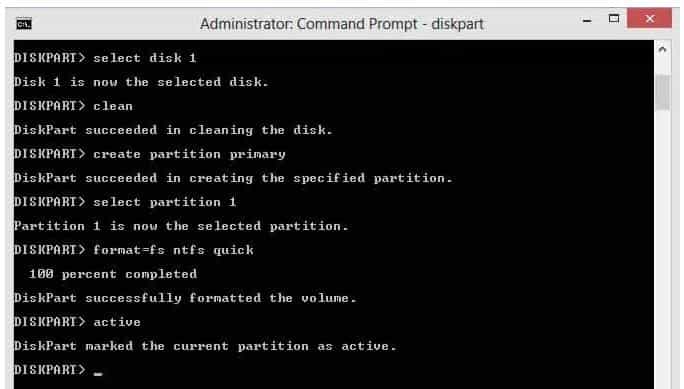
- Now type active and hit the enter key. This shall mark your primary partition as active.
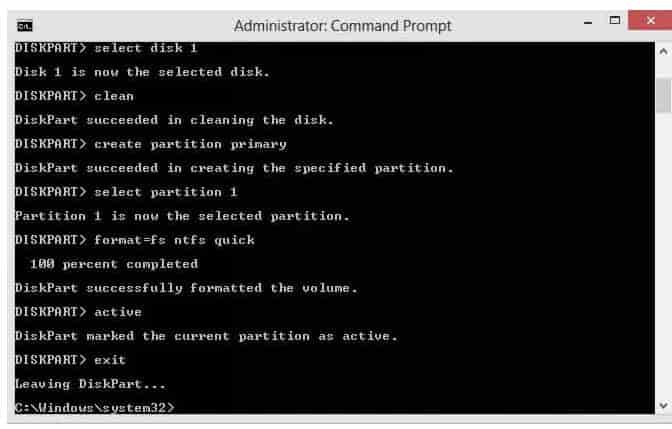
- Type exit and press the enter key to exit the disk part and then close the command prompt.
- Copy all the data to your pen drive from the Windows installation disk.
- All done, Your pen drive is now booted and has the desired windows installation.
Here is a video version for people who like to follow instructions by looking at something:
How to Boot from a USB in Windows 10/11
As now you have created for your windows a bootable pen drive now is the time to boot it and install windows on the computer of your own choice. There are several ways through which you can boot from a pen drive. Following are the most commonly used options:
- When you turn your computer on. The function key (F8, F12) is used to take you to the boot device selection. Note one thing, insert your pen drive before you power on your computer and select your drive.
- The most traditional method that is used to change the boot device order is from the BIOS menu. For this, you change the BIOS settings and also change the boot order.
SEE ALSO: How to Reinstall and Repair Microsoft Windows Store in Windows 10.
Booting from a USB in BIOS
Before you try to boot from a CD, a DVD, or any internal hard drive your system or laptop is set to check for a USB drive first. The problem is that not all are configured this way. You may see that your computer system does not work when you plug in your flash drive before you press your system’s power button. It usually boots into windows, or it does not do anything if you do not have an OS installed yet.
For this purpose, you need to:
Many computers and laptops are used to check for a USB turn on your computer and press DLT, F2, F10 or F1.
- The BIOS must appear
- To navigate use the cursor keys
- Find the Boot Menu
- For the USB to come at the top of the list, change the order.
If these keys are not working for you, to enter the BIOS, after turning the power button on the look for a message on your computer, the word appears at the bottom of the screen that says “press F11” for boot options.”
Sometimes the PCs and laptops do not show this, so you need to check the manufacturer’s website to see which key to press or even the motherboard manual.
When you are in the BIOS. You should look for a menu or an option that leads you to see and change the boot devices or boot priority. This usually differs from BIOS to BIOS but is relatively apparent,
Make sure to turn the first boot option, whatever is set the device is tried first.
The old PC cannot surely boot from the USB. If still, you face any problems make sure that the USB ports have not been disabled in the BIOS. BIOSes work in different ways, but they use information present on the screen to work out how to make a USB drive the first boot device.
One thing needs to be kept in mind is that the USB stick needs to be plugged into a USB port to appear in the list of boot options.
SEE ALSO: How to Auto Sign in/Login in Windows 10/11.
Over to you
In this guide, we have discussed with you different ways on how you can create a bootable pen drive using CMD in Windows 10/11. Try this and make things easy for yourself. We hope to clear on your doubts regarding creating a bootable pen drive.
If you find this article worth a read, then comment below and if you have any queries regarding this then feel free to comment below. I also hope that we haven’t missed anything in explaining how to make a bootable USB in Windows 10/11 using CMD.

